Yoga is known to improve your flexibility, as well as build strength, increase stability, and relieve stress from the body. In this blog, learn about the importance and benefits of flexibility, as well as various stretches to help you become more flexible, such as:
- Cat-cow
- Sphinx
- Bow
- Wide-legged standing forward bend
- Crescent lunge
- Downward-facing dog
- Intense side stretch
- Sphinx
- Bow
- Wide-legged standing forward bend
- Crescent lunge
- Downward-facing dog
- Intense side stretch
Why is Flexibility Important?
Being flexible is more than simply being able to touch your toes with ease (although that’s a nifty side effect). If you keep your muscles flexible, lengthened, and nimble through yoga, you may experience benefits like:
1. Reduced risk of injury and pain: Increased flexibility enables your muscles to withstand more physical strain and corrects imbalances. This minimizes the risk of getting injured while moving your body. Stretching also helps to keep your muscles open so they are less tense, reducing the chances of experiencing muscle aches and cramps.
2. Better balance and posture: Practicing yoga to help boost your flexibility can help enhance balance, as it increases your range of motion, corrects muscle imbalances, and draws awareness to how you hold your body. This makes it easier to sit, stand, and position your body in a certain way with reduced muscular strain.
3. Improved mental health: A relaxed body makes it easier to enter a relaxed mindset. And research agrees that yoga is good for your mental health.
4. Increased strength: Yoga demands that you engage certain muscles to maintain your balance and support your body while you hold a pose.
5. Enhanced physical performance: An overall key benefit of improving full-body flexibility and strength is that your muscles are engaged more efficiently, allowing you to perform physical tasks better.
Poses for Upper Back and Shoulders
Now that you know a bit more about why yoga is so beneficial, let’s get into the practice! Here are three yoga poses that will help you improve the flexibility and strength of your upper back and shoulders:
1. Cat-Cow (Marjaryasana/Bitilasana)


This is a simple vinyasa that entails arching and rounding the spine combined with inhaling and exhaling. The cat-cow is a beginner-friendly pose that targets the abdominals and spine. It’s particularly helpful for those who spend a significant amount of time sitting.
➤ Start on all fours, with your hands aligned under your shoulders and your knees aligned with your hips.
➤ Keep your spine neutral and your neck long by looking straight down and out. Avoid sagging your torso down. It might be helpful to imagine a line running from the crown of your head down the tailbone.
➤ Go into a spinal arch while breathing in slowly and deeply. Curl your toes under and angle the pelvis back so that your tailbone is pointed up. Slowly and with control, let this arch ripple up the spine, from the tailbone to the neck. Drop the torso down, but be mindful not to crash it absentmindedly. Rather, hug your abdominal muscles by drawing your navel in to support your spine. As the arch travels up to the neck, move your gaze up gently, being careful not to strain your neck.
➤ Once the arch reaches your neck, move into a spinal flexion while breathing out slowly. Relax your toes and angle your pelvis to tuck the tailbone in. Again, with control and moving with your exhale, let this move ripple up your spine. Round your spine up, keeping your navel drawn in. When the arch reaches your neck, angle your head down and move your gaze gently to your navel.
➤ Repeat this move for approximately 5-10 breath cycles. On the last breath, move back to the starting position.
2. Sphinx (Salamba Bhujangasana)

Another beginner-friendly pose, the sphinx is a great alternative to the cobra (Bhujangasana) that entails gently raising the torso from a face-down position while the lower body remains on the floor. Since you’re holding yourself up on your forearms, this is a more wrist-friendly backbend than a cobra or up-dog.
➤ Begin face down on the floor, laying on your stomach with your forehead and toes flat on the ground. Bring your legs together so that your heels and feet lightly touch each other. If you experience any lower back discomfort, space your feet a few inches apart.
➤ Place your forearms on the ground, parallel, with the elbows a little bit ahead of the shoulders.
➤ Inhale deeply as you slowly and gently lift your upper body (head, chest, and abdomen) while keeping your navel pressed to the floor. Use your arms for support, but be mindful to not depend too much on them so that you keep engaging your abdominal and back muscles.
➤ Hold the pose while you continue to breathe deeply. Maintain awareness of all parts of the body as you breathe. Check that your heels and feet are still close together and try to keep your head facing forward.
3. Bow (Dhanurasana)

This is an intermediate-level yoga pose that is one of the 12 basic Hatha yoga stances. It involves lifting the upper body up and back to open the chest and deeply stretch the spine. This pose can be done regularly as part of your yoga practice, as part of a series of back stretches, or to prepare for a deeper backbend or advanced back-intensive poses. Because it’s an intermediate pose, ensure you have sufficiently warmed up before performing the bow.
➤ Start by lying face-down on your yoga mat. Lay flat on your stomach, with your chin on the mat and hands at your sides, palms facing upward.
➤ Keep your knees approximately hip-width apart. Slowly exhale as you bend your knees to bring your heels up as close to your buttocks as you can.
➤ Lift your hands from your sides to grasp your ankles with your fingers, but not your thumb. To avoid injury, hold your ankles (instead of your toes or the tops of your feet). Remember to point and flex your toes for an additional stretch. Pointing stretches the ankles, and flexing helps to activate the hamstrings and glutes to better support the pose.
➤ Take a deep, controlled breath in as you lift your heels up and away from your buttocks while maintaining a steady grip on your ankles. At the same time, lift your head, chest, and thighs away from the floor until only your core is touching the yoga mat. As you lift your torso, pay close attention to your joints. Make sure to rotate your shoulders comfortably and safely.
➤ Hold the pose for approximately five breaths. You may feel this as a deep stretch in your back, chest, and shoulders. Deepen the stretch by drawing your tailbone to the floor. Focus on keeping your balance and regulating your breathing.
➤ In a gentle and controlled manner, slowly exhale as you release the pose. Lower your legs, chest, and head back toward the mat, then let go of your ankles and return to the starting position.
Poses for Legs and Hips
These are our top four yoga poses to make your legs and hips more flexible:
1. Wide-Legged Standing Forward Bend (Prasarita Padottanasana)

This calming stretch is an alternative to the headstand (Sirsasana) and a good alternative for those experiencing neck issues. On top of improving the flexibility of the legs, hips, and spine, this yoga pose also helps tone the abdominal muscles, alleviate mild back pain, and promote oxygen flow to the brain.
➤ Assume the starting position by facing the long side of the yoga mat in a mountain (Tadasana) pose, in other words, standing upright with your feet facing forward and parallel to each other. Your arms should be relaxed at your sides.
➤ Widen your stance to approximately three to four feet by stepping one foot to the side. Maintain your balance by putting your hands on your hips. It’s ideal to keep your legs straight but not forced. However, for those who have tight hips or hamstrings, you can modify this pose with a gentle bend in the knees so that you can still fold forward at the hip joints and elongate your low back.
➤ Lift your torso to engage your core muscles then, slowly and in a controlled manner, fold over at the hips over your legs. Keep your back straight and focus on bending at the hip joints instead of the lower back. If you feel that your back is starting to round, return to an upright position and try again.
➤ Once you have fully folded over at the hips, lower your hands to the floor at a shoulder-width distance. Stretch your torso forward.
➤ To deepen the stretch in your legs and hips, bring your head down to the floor. Elongate your spine from the tailbone to the top of your head.
➤ Hold the pose for several breaths. When you’re ready to release the pose, anchor your feet as you slowly lift your torso back up.
2. Low Lunge (Anjaneyasana)

This is a popular yoga pose, often familiar to non-yogis, that is part of the Sun Salutation C sequence. The crescent lunge provides a deep stretch in the hips and quadriceps. For those who are more flexible or advanced in their practice, it can even be performed with a deep stretch similar to a backbend.
There are many benefits to incorporating the crescent lunge into your yoga practice. It stretches the quads and hip flexors (much needed if you sit a lot), builds stability and balance, and opens the shoulders, chest, and torso.
➤ As mentioned, this pose is typically part of the Sun Salutation C sequence. So, transition from a low lunge (runner’s lunge) and kneel on the mat with your back knee (left). You can use a blanket or cushion for additional support and comfort.
➤ Ensure that your upright knee (right) is directly over your ankle, forming a 90-degree angle. Place both hands on your knee.
➤ Take a deep breath in as you lift both arms above your head until they are aligned with your ears. If you’re comfortable and able, arch your upper spine further into a backbend to stretch your back.
➤ Deepen the lunge by pressing firmly into your right foot and shifting your hips forward. This will bring your left thigh closer to the floor, opening your hips and stretching your quads.
➤ Release the pose by slowly exhaling as you bring your hands down. Drift your hands to the floor and frame your right foot with your palms. You can either stand up and simply switch feet (low lunge with your left foot in front and right foot at the back), or transition with a vinyasa.
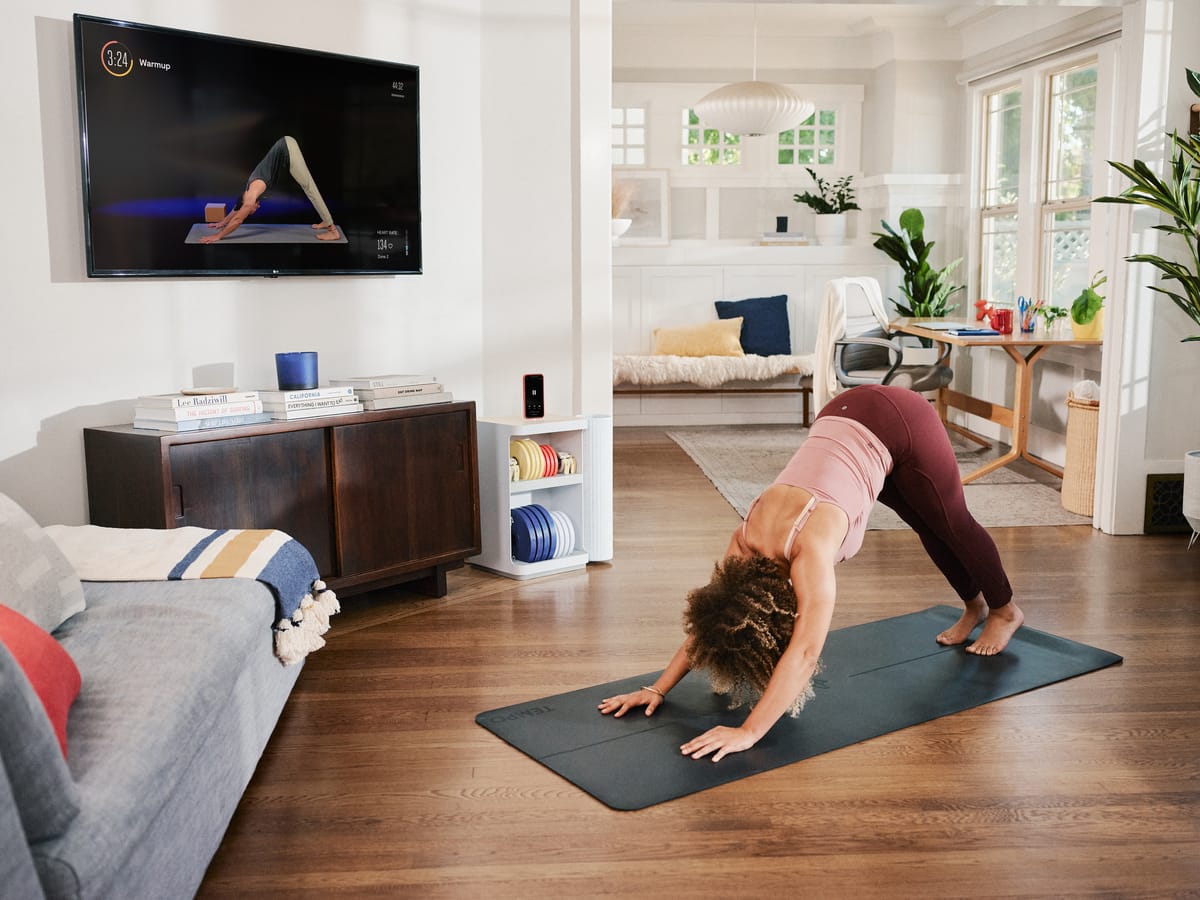
3. Downward-Facing Dog (Adho Mukha Svanasana)

The downward-facing dog is possibly the most popular yoga pose. It’s one of the first poses taught to beginners and remains a constant fixture in everyone’s yoga practice. The downward-facing dog is typically done multiple times in a yoga session, functioning as both a transitional pose and a resting pose. Though it’s taught early and often, downward-facing dog is actually not that easy and can feel quite demanding!
This well-known asana is frequently done not only because of its popularity, but also because it’s essential to contemporary practice. The downward-facing dog is a full-body stretch with multiple benefits. It boosts flexibility in the calves and hamstrings, strengthens the arms, engages the abdominal muscles, relieves pressure from the back, and promotes blood and oxygen flow to the brain.
➤ There are multiple ways you can start. For beginners, you can begin on all fours with your hands and wrists under the shoulders, and your knees under your hips. For more advanced yogis, you may transition from a high plank position with your hands on the ground, wrists directly under the shoulders, and body straight with toes on the floor.
➤ Curl your toes and leverage your hands to push the body back, lifting your hips into the air until you form an inverted V-shape. Work the legs toward being straight, but for those who feel tightness in their hamstrings or lower back, it’s advantageous to bend the knees a little. This can help lift the hips higher and straighten the spine. You should feel a deep stretch along the back of your legs. If you’re unable to flatten your heels on the ground, this will come with time and regular practice. Just push as far back as you are comfortable and able.
➤ Once you are stable, spread your fingers wide and ground down into your fingertips, engaging your whole arms to support you. Rotate your upper arms outward to open the chest. Draw your shoulders away from your ears by pushing the floor away from you.
➤ Allow your head to hang loose. This will enable you to feel a stretch in your upper spine. You may pedal your feet to alternate the stretch between legs.
➤ Release the pose on an exhale and return to your starting position.
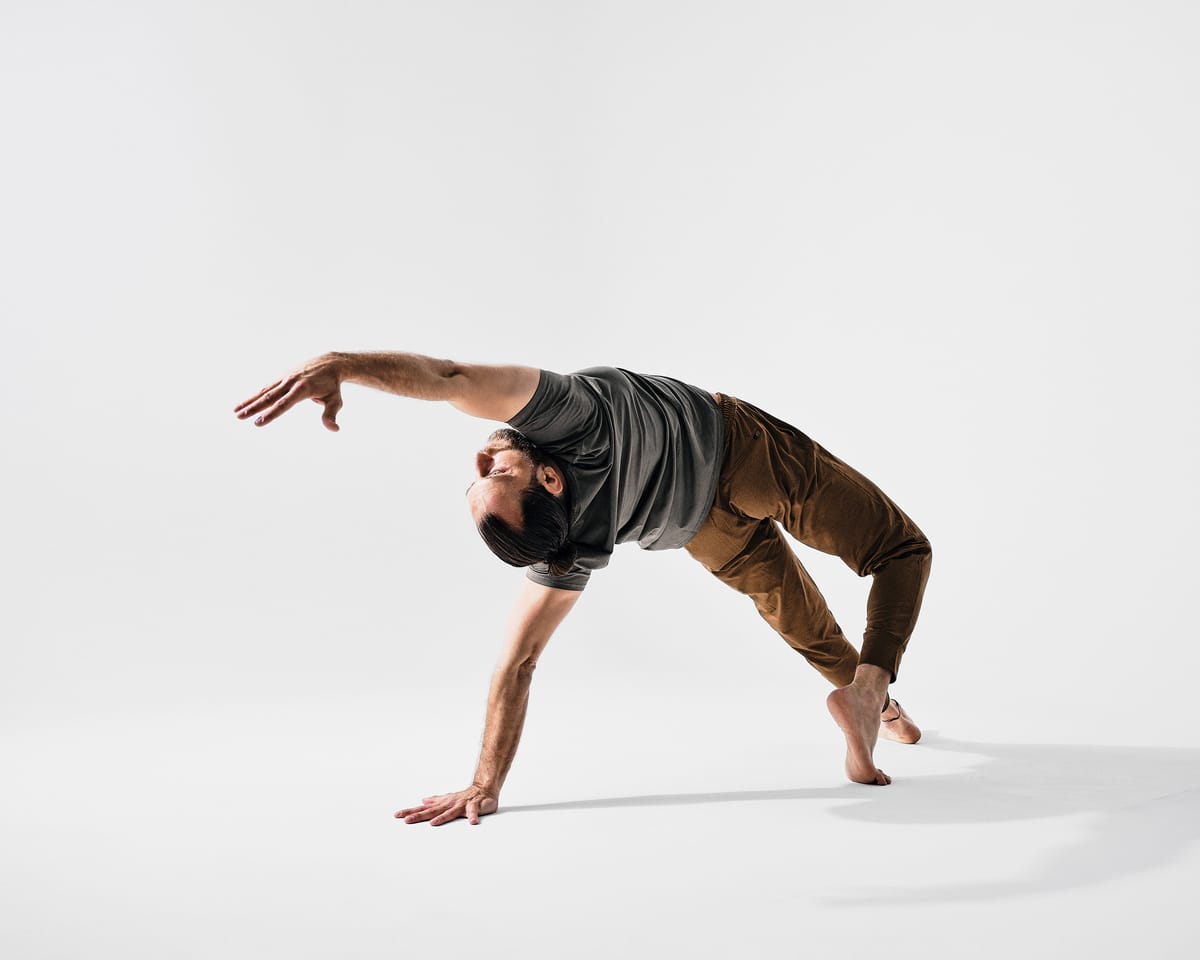
4. Intense Side Stretch (Parsvottanasana)

Don’t let the name intimidate you. The intense side stretch, also known as pyramid pose, is an important addition to any yoga practice, as it helps boost flexibility in the shoulders and hamstrings — both of which are essential to yoga as well as everyday mobility. It’s a deep forward stretch that guides the body into a narrow, constrained stance, so it cultivates integrity, strength, and balance.
The intense side stretch opens the hips, shoulders, and chest; strengthens the legs; lengthens the hamstrings; and improves balance. It can also help reduce the risk of shoulder and wrist injuries and hamstring tears.
➤ Begin with a mountain pose at the top (short side) of the mat. Square your hips and place your hands on your hips.
➤ Starting with your right foot, step back a few feet. Align your heels, with the back foot at a slight outward angle. Keep your hips pointed forward by pulling your left hip back slightly.
➤ Take a deep breath as you spread your arms to the side. Exhale as you rotate the arms and bend your elbows to press your palms together behind your back. If you are still building your flexibility, you can modify it by placing your hands on blocks or your shins.
➤ Take another deep breath as you engage your quads and lengthen your spine. Then, exhale as you fold at the hips and bend forward toward your front quad. Make sure to keep openness in your front as you lengthen your back. Avoid crashing forward into your chest and collarbones.
➤ Hold the pose for a few seconds as you feel the stretch in your legs and back. Stay neutral in your neck.
➤ Release the pose with a deep inhale as you leverage your legs to stand upright again. Let go of your arms wherever you have chosen to position them and return to a mountain pose.
Tips to Safely Practice Yoga Poses for Flexibility
When building your flexibility through yoga, it’s crucial to take appropriate safety precautions no matter your skill level.
If you have an existing health condition, or if you’re experiencing certain physical restrictions (e.g., you’re pregnant or recovering from injury), talk to your doctor or physical therapist first. Educate yourself on what each yoga pose entails and explore modifications to reduce your risk of injury.
If you’re a beginner or getting back into yoga after a long pause, take it slow and learn the basics. It’s more important to engage the right muscles efficiently rather than quickly moving on to complex poses.
Listen to your body. Whether you’re taking a live class or going at your own pace, don’t let the presence of an instructor or timer get to you. If you feel unwell or uncomfortable at any point, pause your workout and take a breath. If you feel that you might injure or overstrain yourself with a certain pose, modify your stance into one that you feel safe performing.
Improve Your Flexibility with Tempo
With a diverse range of yoga workouts, Tempo is the only home gym system with a built-in trainer to help you realistically achieve your fitness goals. Choose from Tempo Studio — our most powerful, all-in-one solution — or Tempo Move, designed to fit anywhere. No matter what device you have, any Tempo membership gives you a yoga studio in your home and Head Yogi Jeremy Falk will be with you every step of the way.
Training at home will never be the same. Shop Tempo today!